As a dedicated Genshin Impact player, I've spent considerable time mastering the intricacies of Teyvat's divine rulers, the Archons. With the arrival of Fontaine, the stage was set for the Hydro Archon, and Furina—also known as Focalors—did not disappoint. Now, in 2026, with the meta well-established, I can confidently say she remains one of the most versatile and powerful characters in the game. Her design as a phenomenal Hydro DPS who can also excel as a reaction trigger offers players multiple avenues for team-building and combat strategy. However, unlocking her full potential hinges on understanding the distinct artifact and weapon choices for each playstyle. Let me share my insights from countless hours of exploration and combat with her.

The Dominant Main DPS Build 🗡️
When I first summoned Furina, my instinct was to place her front and center as my team's main damage dealer. This playstyle is not only intuitive but also highly effective and represents her primary combat role. The core of this build revolves around her Elemental Skill, 'Salon Solitaire'. Upon activation, she summons three charming yet deadly water creatures—her Salon Members. What sets them apart from other deployable skills is their relentless pursuit. They actively follow enemies across the battlefield, ensuring consistent Hydro application and damage without needing constant repositioning. Their damage scales directly with Furina's Max HP, and they possess a unique mechanic: they consume a portion of your entire party's HP to unleash significantly higher damage.
This HP consumption mechanic is a double-edged sword. It empowers her damage output but introduces a crucial team-building requirement: a reliable healer. From my experience, pairing her with a strong team-wide healer is non-negotiable. The best companions for this role are:
-
Sangonomiya Kokomi: Provides exceptional healing, enables Hydro Resonance for more HP, and applies Hydro off-field.
-
Jean: Offers powerful team-wide healing and can shred Hydro Resistance using the 4-piece Viridescent Venerer artifact set, amplifying Furina's damage further.

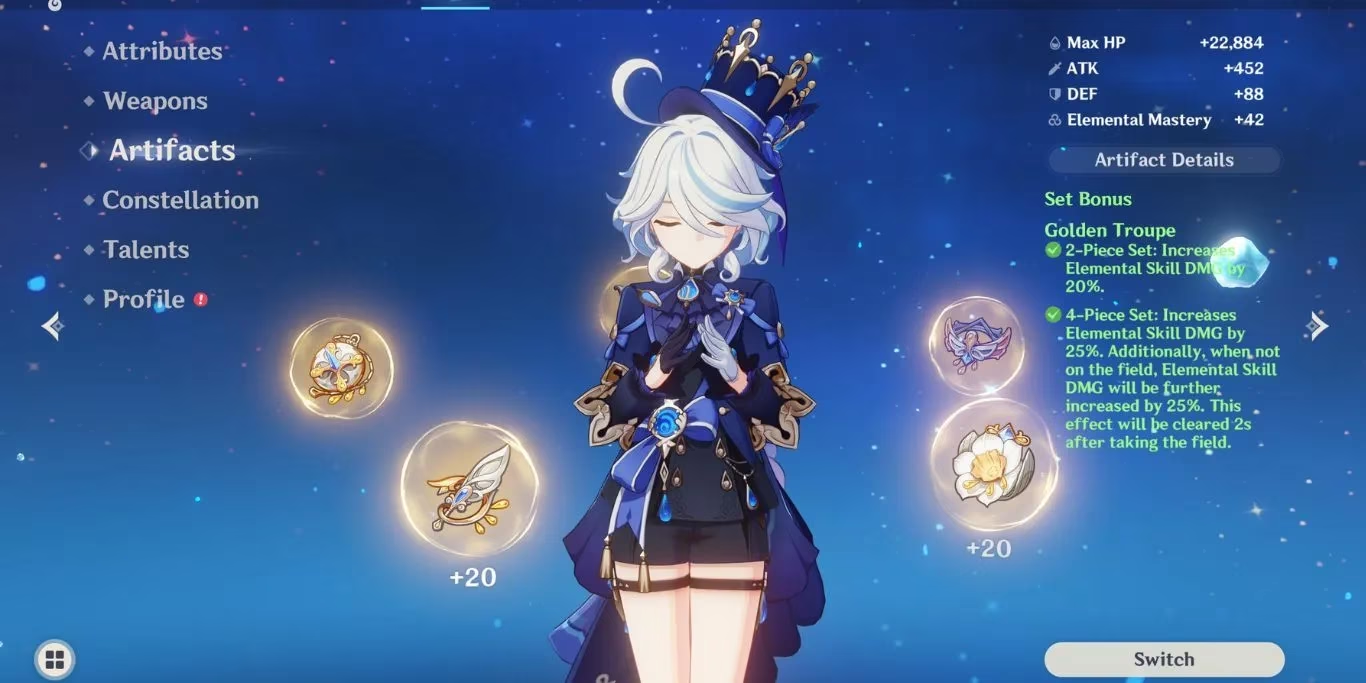
For artifacts, the 4-piece Golden Troupe set is unequivocally her best-in-slot. Its effect grants a massive boost to Elemental Skill DMG—up to 70%—as long as the character is off-field. Since Furina's Salon Members persist and deal damage while she is swapped out, she benefits from this bonus nearly constantly.
Weapon choice defines the ceiling of her power in this role. Here’s a breakdown of the top contenders:
| Weapon | Key Benefits | How to Acquire |
|---|---|---|
 Splendor of Tranquil Waters Splendor of Tranquil Waters |
Her signature weapon. Offers an immense 88.2% Crit DMG stat and further boosts Elemental Skill DMG and Max HP. | Weapon Banner (when Furina is featured). |
 Festering Desire Festering Desire |
An excellent event-limited option. Provides a direct 32% Elemental Skill DMG boost and 12% Elemental Skill CRIT Rate. Its Energy Recharge substat helps fuel her Burst. | Historic limited-time event (unavailable now). |
 Wolf-Fang Wolf-Fang |
A powerful Battle Pass weapon. At maximum refinement, it grants up to 32% DMG to both Skill and Burst, plus 16% Crit Rate for both. | Battle Pass (Gnostic Hymn reward). |
 Fleuve Cendre Ferryman Fleuve Cendre Ferryman |
The premier free-to-play option. It solves Energy Recharge needs and provides some Elemental Skill Crit Rate, though it lacks direct damage multipliers. | Fishing exchange in Fontaine. |
The Versatile Reaction Trigger Build ⚡
Furina's capability to deploy her Skill and swap out makes her an exceptional enabler for elemental reaction teams. Hydro is arguably the most versatile element for triggering reactions, and Furina applies it rapidly and consistently, especially against single targets. Her Elemental Burst, 'Let the People Rejoice', further elevates this role by providing a massive, team-wide DMG bonus (excluding Bloom-based reactions) as party members gain or lose HP—a mechanic that synergizes perfectly with her own HP-draining Skill.
For this supportive, off-field role, weapon priorities shift. The goal is to enhance her utility and reaction damage:
-
 Freedom-Sworn: A premium choice that grants Elemental Mastery to boost reaction damage and provides a powerful team-wide ATK and Normal/Charged/Plunging Attack DMG buff.
 -
 Xiphos' Moonlight: Another superb sword offering Elemental Mastery and converting that EM into Energy Recharge for herself and the team, smoothing out energy requirements.
Artifact sets for this build offer flexibility based on your team's core reaction:
-
4-piece Tenacity of the Millelith: The general best-in-slot. When Furina's Salon Members hit opponents, they trigger the set effect, granting a 20% ATK boost to the entire party and strengthening her own HP-based shields. It perfectly supports both her personal damage and team utility.
-
4-piece Flower of Paradise Lost: A specialized option. This set is only recommended if you are building a team focused specifically on Bloom, Hyperbloom, or Burgeon reactions, as it significantly boosts those damages. Remember, her Burst does not affect Bloom reaction damage.
Optimizing Artifacts & Talents: The Universal Priorities 🎯
Regardless of whether I'm running her as a hyper-carry or a support, her artifact stat priorities remain largely consistent, with a slight adjustment for Elemental Mastery in reaction-focused teams. The golden rule: Max HP and Crit are king. Her damage scales beautifully with HP, making it a more valuable stat than ATK in most cases.
Here’s the stat priority table I always reference when farming for her:
| Artifact Piece | Main Stat Priority | Sub-Stat Priority (in order) |
|---|---|---|
| Flower (Fixed HP) | HP (Fixed) | Crit Rate / Crit DMG > Energy Recharge > HP% |
| Feather (Fixed ATK) | ATK (Fixed) | Crit Rate / Crit DMG > Energy Recharge > HP% |
| Sands | HP% | Crit Rate / Crit DMG > Energy Recharge |
| Goblet | Hydro DMG Bonus or HP% | Crit Rate / Crit DMG > Energy Recharge > HP% (if not main stat) |
| Circlet | Crit Rate or Crit DMG | The other Crit stat > Energy Recharge > HP% |
Aim for a Crit Rate/DMG ratio close to 1:2, and ensure you have enough Energy Recharge (typically 140-160% depending on team) to use her Burst consistently.
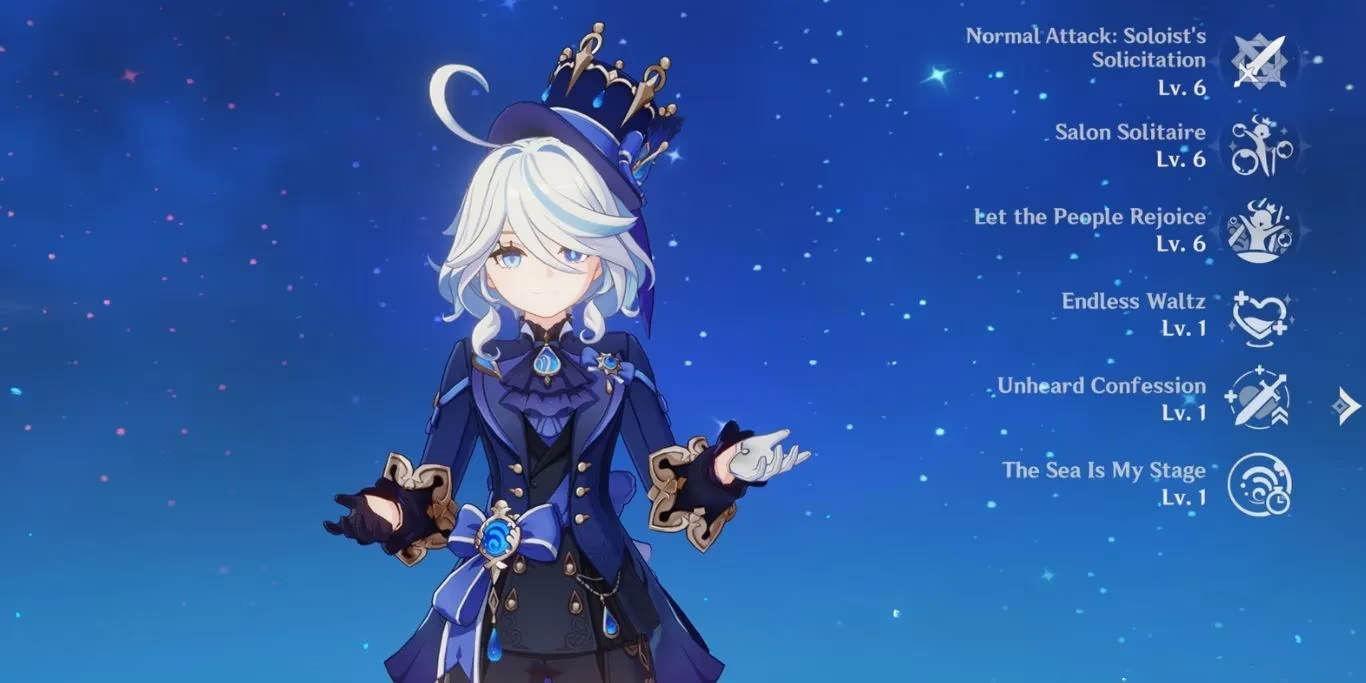
When it comes to leveling her talents, efficiency is key. My upgrade path has always been:
-
Elemental Skill (Priority #1): This is the cornerstone of her kit, responsible for the vast majority of her damage and Hydro application. Maximize this first.
-
Elemental Burst (Priority #2): Her Burst provides an enormous, team-wide damage multiplier. Leveling it up increases the Fanfare stack cap and the bonus per stack, making it a significant damage increase for your entire party.
-
Normal Attack (Lowest Priority): You can safely leave this talent at level 1. Furina almost never uses her normal attacks in optimized rotations, saving you precious resources.
The Verdict: Is Furina Worth Your Primogems in 2026? ✅
As someone who advises both new and veteran players, the question of a character's value is paramount. For Furina, the answer is a resounding yes. Her flexibility is unparalleled. She can anchor a team as a main DPS, enable some of the game's most powerful reaction compositions as a support, and her unique HP-drain-and-heal mechanics add a dynamic layer to team synergy. Beyond combat, her ability to walk on water indefinitely using her Skill is a quality-of-life blessing for exploring Fontaine's vast oceans and beyond.

She is not just a powerful Archon; she is a transformative unit that elevates numerous team archetypes. Whether you are a free-to-play adventurer or a seasoned collector, Furina's value to any account is immense. Investing in her is an investment in one of the most future-proof and versatile cores the game has to offer. My journey with her has been filled with spectacular hydro-infused victories, and I have no doubt she will continue to be a cornerstone of the meta for years to come.