As a dedicated traveler exploring the vast and wondrous lands of Teyvat, I find the daily Commission Quests to be a delightful routine, offering fresh adventures and glimpses into the lives of its inhabitants. With the Sumeru region now fully integrated into my journey, I've encountered a myriad of new tasks, each with its own charm and challenge. One such commission that stands out for its engaging premise and scenic location is 'To Measure The World!'. This quest, while part of the randomized daily rotation, presents a perfect blend of simple objectives and environmental navigation that makes completing it a satisfying start to any in-game day. Let me walk you through my experience and the steps to efficiently finish this task.
Finding the Quest and Meeting Farghani
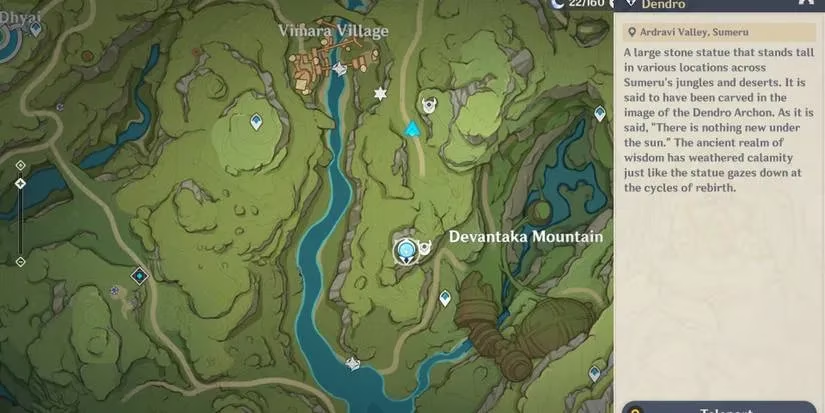
My adventure for 'To Measure The World!' always begins in a specific, picturesque location. To find this commission, I head to the southeastern area of Vimara Village in Sumeru. The map coordinates point to a tranquil spot where the researcher Farghani is typically stationed, eagerly awaiting assistance. Upon approaching him, he explains his scholarly endeavor and requests help in deploying measurement beacons for his geographical studies. His passion for cartography is infectious, and I'm always happy to lend a hand (and my gliding skills) for the sake of science!
The Journey to the Mountaintop

Accepting the quest, Farghani entrusts me with three special beacons. The real journey, however, is reaching the deployment site. From his position, I turn to the right and scale the nearby mountainside. The path leads to a series of Four-Leaf Sigils—those wonderful, verdant constructs that allow for swift, aerial traversal across Sumeru's lush landscapes. I use the first Sigil directly ahead, then follow the chain of two more. This exhilarating zip-line ride through the air culminates at the very summit of the mountain, revealing a surprising scene: a modest dwelling and a small camp of Eremite mercenaries.
Securing the Area
Before I can focus on the delicate task of placing the beacons, the hostile Eremites demand attention. In my experience, this skirmish is a straightforward encounter. The group usually consists of standard foot soldiers, and with a well-coordinated elemental reaction or two, they are swiftly dispatched. Clearing the area ensures I can work on Farghani's project without interruption, turning the mountaintop from a contested outpost back into a serene research site.
Placing the Three Beacons
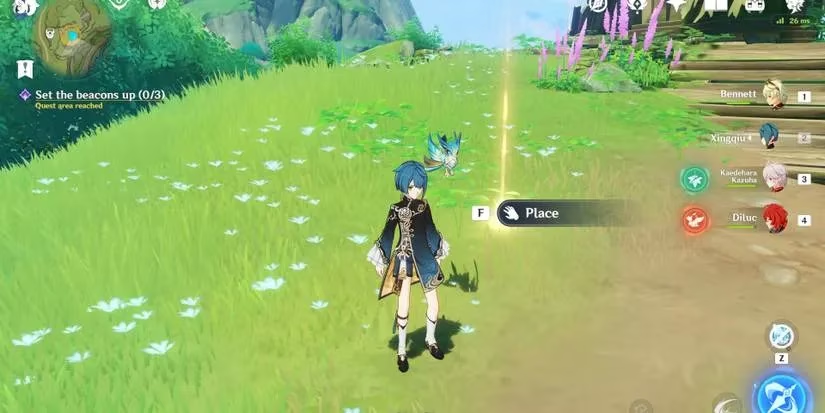
With peace restored, I set about the main objective. Farghani's beacons need to be placed at three distinct points around the small house. The game kindly marks these locations with a soft, shimmering golden light on the ground.
-
The First Beacon: This spot is usually the most immediately visible. It's located on the open ground in front of the house, bathed in that tell-tale yellow glow. I simply approach and select the 'Place' option to secure the first beacon.

-
The Second Beacon: For the second, I walk around to the rear of the small structure. Tucked away behind it, another glowing marker awaits. This one is a quick find, literally just a few steps away from the first.

-
The Third and Final Beacon: The last placement is a bit more of a scavenger hunt. From the back of the house, I head to the left side (or the right side, depending on my orientation). I navigate past a set of stairs and scan the grassy perimeter. There, often nestled beside the terrain or near the cliff's edge, I find the final glowing marker to place the last beacon.
Reporting Back and Claiming Rewards

Mission accomplished! With all three beacons securely placed, my duty is to return to Farghani with the good news. I retrace my steps to the cluster of Four-Leaf Sigils and enjoy the swift descent back down the mountainside, a satisfying conclusion to the climb. Finding Farghani in his original spot, I deliver my report. He expresses his gratitude, and the quest officially completes, showering me with the standard commission rewards.
The Spoils of Adventure
Completing 'To Measure The World!' grants a satisfying bundle of resources that aid my continual journey:
| Reward | Description |
|---|---|
| Primogems | A fixed reward of 10 Primogems, the precious currency for wishes. |
| Adventure EXP | Contributes to increasing my Adventure Rank. |
| Mora | The universal currency of Teyvat, always useful. |
| Companionship EXP | Strengthens the bonds with the character in my active party. |
| Enhancement Ore | Includes both Fine and Mystic Enhancement Ore for upgrading weapons. |
It's important to note that while the Primogem count is constant, the quantities of Mora, EXP, and ores can scale slightly with my Adventure Rank. As a seasoned traveler in 2026, I've learned that the true daily prize comes after completing all four commissions. I always make sure to visit Katheryne at the Adventurers' Guild afterward to claim the additional Daily Commission Bonus, which includes another 20 Primogems and more valuable resources. This quest, with its simple objectives and beautiful Sumeru backdrop, remains a personal favorite—a small but meaningful contribution to measuring the magnificent world of Teyvat.